Android Navigation Arch Component
- 11 minutes read - 2232 wordsAbout
On the Google IO 2018 event, there was an announcement of JetPack — a set of libraries to help and boost the Android development. These libraries are bringing the development of the essential parts of an application to a completely new level. By essential parts I mean things like handling configuration change, persisting data, executing operations in the background and so on. Some of those libraries were announced at Google IO 2017, and by now are having a stable release, and some of them are completely new. One of the new libraries is the Navigation.
What is Navigation
The Navigation component is a new architecture component that is supposed to simplify the implementation of the navigation in an application. At the very beginning, it’s important to mention that the Navigation component is scoped to a single Activity. It means that it embraces the idea of using single activity with multiple fragments for navigating through different parts of the application. So, an Activity(preferably an entry point into the application) would contain a Navigation component. Then, one of the fragments of this Activity could potentially point to another Activity, which would have to define its own Navigation scope. Now, this does sound a little bit tricky because of the well-known problems with the fragments and the fragment manager, but the good news is that this Navigation component is there to do these things for us. So the fragment management is done by itself.
Why Navigation
This is one of the first questions that come to mind when thinking about the Navigation component. As mentioned earlier, there was a well-known problem with the fragments and many developers were trying to avoid using fragments, or at least avoid working with the FragmentManager. Turns out, the need of such component lays in the fact that the activities are having some limitations too.
It is more that Activities are inherently limited in unfixable ways. Trying to use property animations? Not with activities. Trying to pop multiple activities off the stack as an atomic operation? Nope. Want a consistent default animation? Not with manufacturer customizations
— Ian Lake (@ianhlake) May 15, 2018
Fair enough, the arguments that Ian Lake points out in this tweet are more than enough to think about making more robust and easy to use solution. The Navigation component is not only helping to sort out those problems mentioned by Ian Lake in that tweet, but it brings some awesome features like safe arguments passing, default arguments, handling deep links, automatic setup with side NavigationView and with the BottomNavigationView. Furthermore, there is also a visual editor where all these things can be wired up together, and the developers can take an overview of what’s going around and understand and manage the structure lot easier. Let’s take a closer look.
Getting Started
I would highly recommend the official guide for the new Navigation component, as well as its documentation to get rolling with the implementation.

Get started with the Navigation component
I’ve created a simple playground project where I was trying various things with the Navigation component. Keep in mind that I am using the latest version of Android Studio from the Canary Channel.
To begin with, we have to declare the Navigation component dependencies in our build file, followed by sync: (note: the versions of the dependencies are aligned with the time this article is written)
implementation 'android.arch.navigation:navigation-fragment-ktx:1.0.0-alpha01'
implementation 'android.arch.navigation:navigation-ui-ktx:1.0.0-alpha01'
Define Navigation Graph
In order to start with the Navigation component, we have to first define the navigation graph. The navigation graph is nothing but an XML file that is getting placed in the navigation folder in the resources. With a right-click on the res folder, we choose New -> Android Resource File

Create new resource
Then, in the New Resource File window, we specify a name for the file, followed by choosing Navigation as Resource type
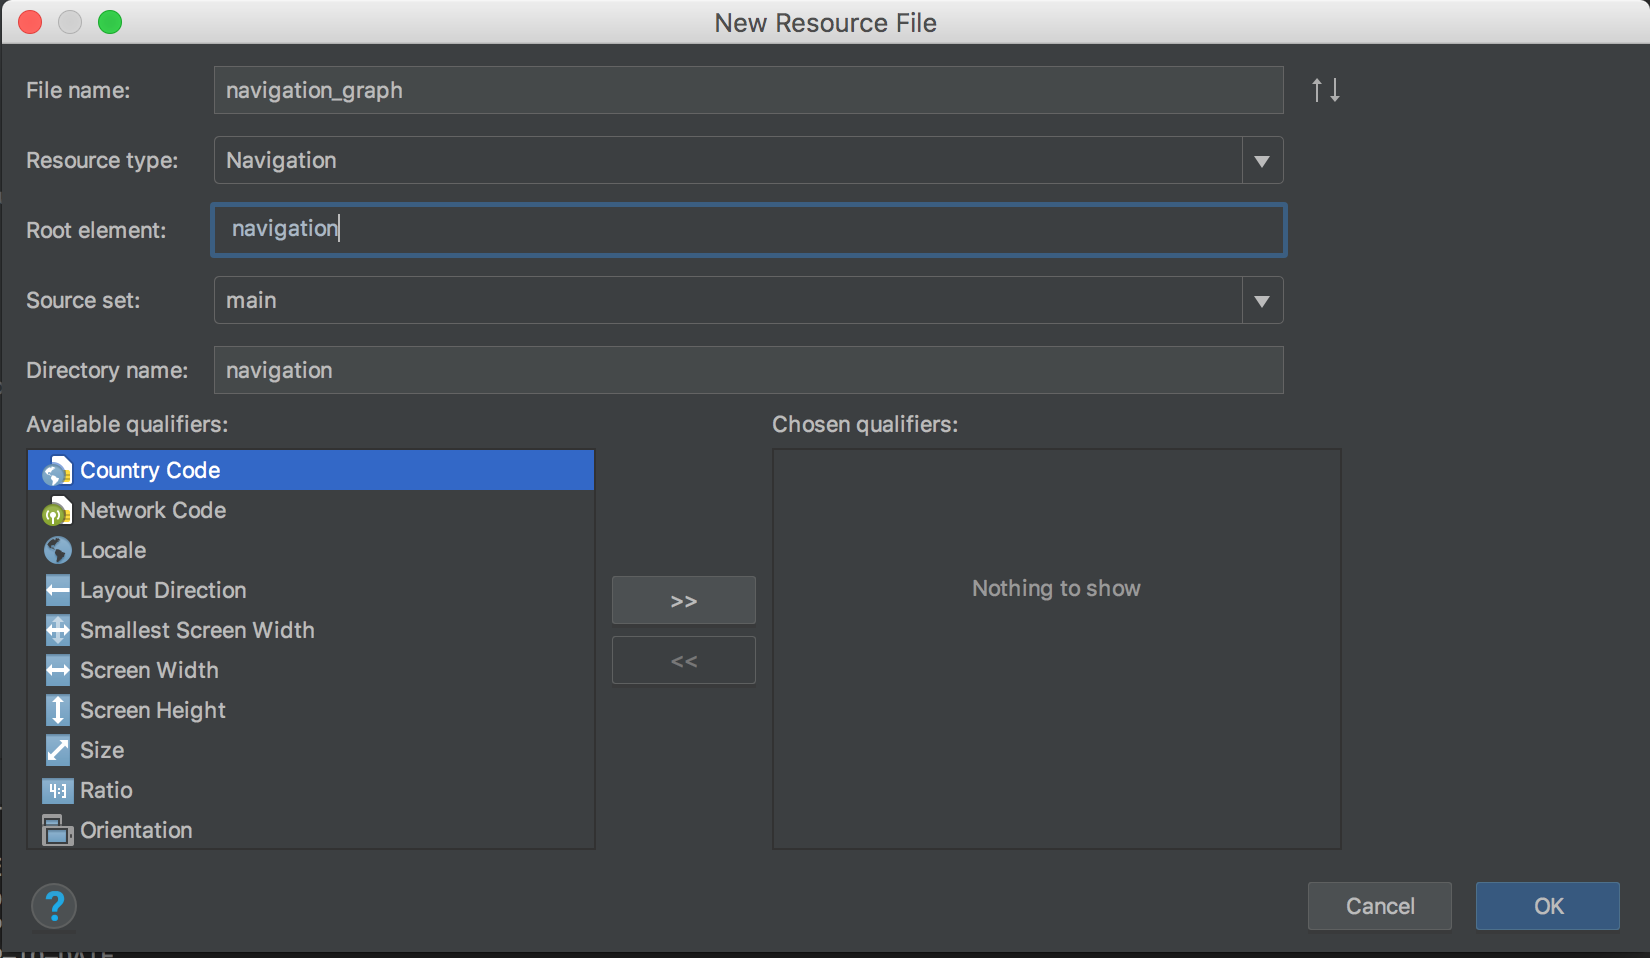
Define new navigation graph resource file
Once done, the newly defined navigation graph is getting opened with the navigation editor in the studio. By using the latest Android Studio we are able to see this XML file in design preview as well as edit the XML as text. The same that we could do with the layout files. The navigation editor provides an ability to wire the things up and configure the navigation in the desired way.

Empty navigation graph in the navigation editor
Next, there is a need for a host fragment to be defined. In the example I shared, we have an Activity that has a layout named activity_main where this host fragment is defined. In this layout, we also include a BottomNavigationView, in order to investigate some interesting things how the new Navigation component works with it.
We see 2 new attributes in the definition of the host navigation fragment: app:defaultNavHost="true" and app:navGraph="@navigation/navigation_graph".
The former one makes sure that the NavHostFragment intercepts the system Back button. In our activity we also have to overwrite onSupportNavigateUp() method as follows:
class MainActivity : AppCompatActivity() {
    ...
    override fun onSupportNavigateUp() =
        findNavController(R.id.mainNavigationFragment).navigateUp()
}
The latter one is used to define which navigation graph from the navigation resources folder is going to be assigned to the NavHostFragment. Once we define that in the XML, we could get back to the navigation editor in the studio. As we can see, now it displays the host as expected:

Host of navigation graph
Now we can go on and some destinations in the navigation graph, directly in the navigation editor
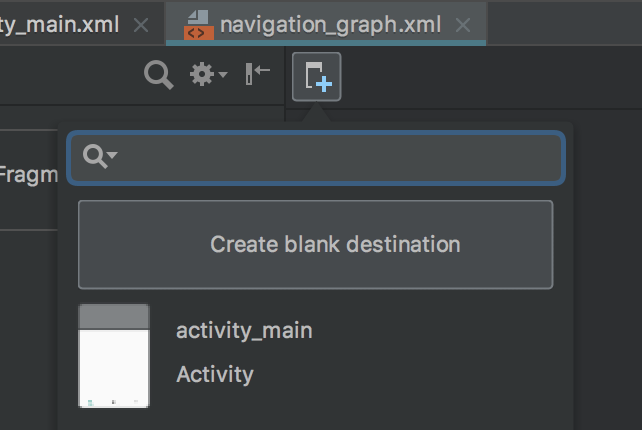
Create new destination window
For our case, I defined 4 destinations. The first three to serve the BottomNavigationView we have in the main_activity, and the fourth one to be used as a detailed preview that will get opened after a click on an action. Here is how it looks in the navigation editor
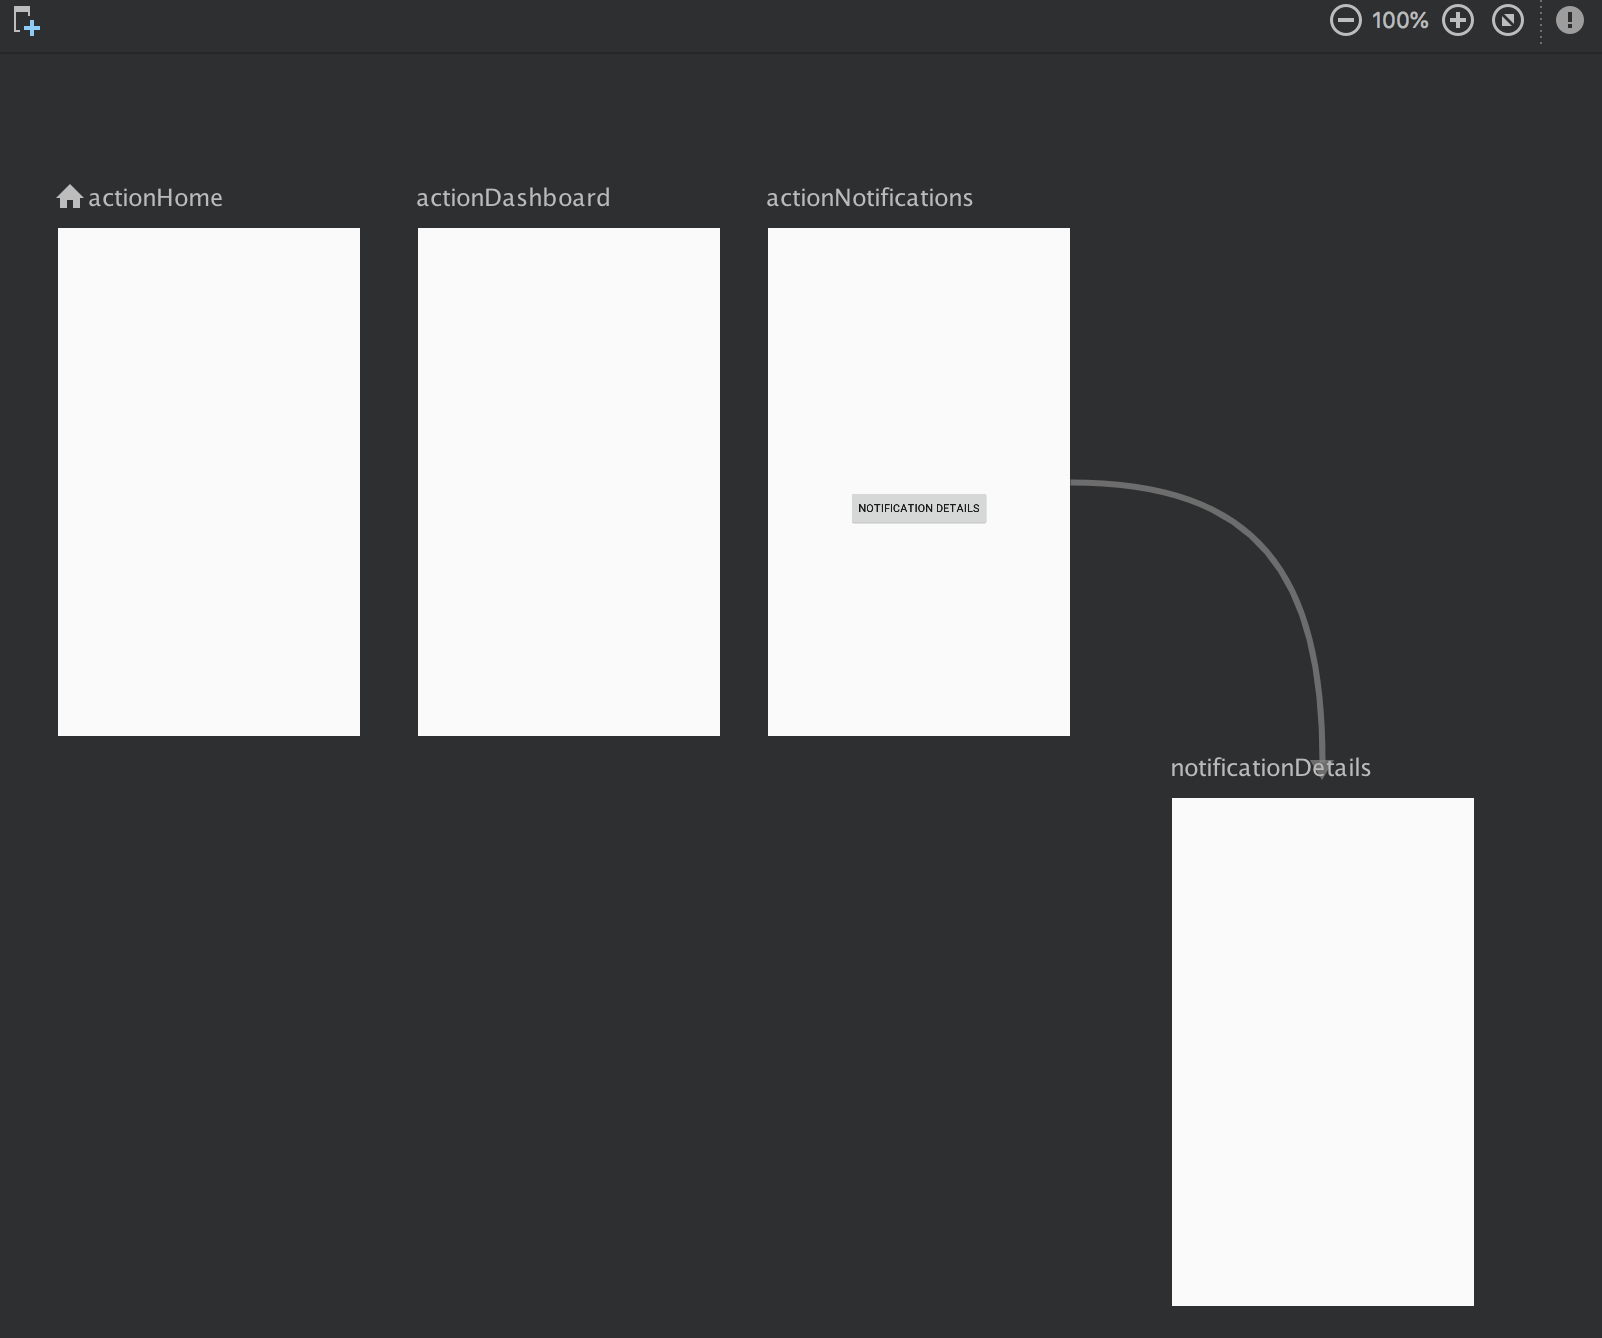
Navigation editor
Then, as mentioned before, to make this setup work with the BottomNavigationView, we need a very little effort. As we can find out in the navigation graph, the items we defined in it are having id attributes
By simply making the ids of the menu items for the BottomNavigationView same as these ids in the navigation graph, the setup is almost done. An important note on this is that this can be used for menu items in a side NavigationView drawer and Toolbar’s menu items too. It does not, however, work for the popup menus. There are just two lines of code that we have to add in the activity to wire them up, so that clicking on a particular menu item will navigate to the desired destination.
val navController = findNavController(R.id.mainNavigationFragment)
bottomNavigationView.setupWithNavController(navController)
But, since we also have a toolbar, we also want to set up the toolbar with the navigation, so when we navigate to a new screen, we would like to update the Toolbar’s title. To achieve that, we add one more line
setupActionBarWithNavController(navController)This line is a Kotlin extension function on the AppCompatActivity class. Eventually, the activity’s code became like this:
With a very little effort we made the navigation work together with the BottomNavigationView and the Toolbar.
As mentioned before, the call to setupActionBarWithNavController is an extension function, and here is how it is defined:
fun AppCompatActivity.setupActionBarWithNavController(
 navController: NavController,
 drawerLayout: DrawerLayout? = null
) {
 NavigationUI.setupActionBarWithNavController(this, navController, drawerLayout)
}
It’s interesting that optionally, we could pass in that function a DrawerLayout if we had one. So it will set up both the Toolbar and the side NavigationView to work with the Navigation. However, there is no option to pass a BottomNavigationView and it has to be done by making that additional call in the activity. I was wondering why is that, and I did a little investigation, and the result is the following.
Guideline Updates
If you check out and try out the example I shared, you will notice a very weird thing. Mainly, the app opens the home destination as we have set it before, but if you try to open some of the other sections on the bottom navigation, it will display its fragment, it will update the title on the Toolbar, but also it will add an up action on the toolbar. Now, this looks quite weird and initially, I thought that it is a bug. So I reported it as an issue, because, as of the Bottom Navigation Guidelines, navigating to another section in the BottomNavigationView and then clicking the system back button should not get the user back to the initial screen, but rather close the screen. So, navigating to a separate section should not add the new section to the stack, and clicking back pop it from the stack. But in my case, the result was unexpected:

Surprisingly enough, as we can see from the response from the Google Devs in the reported issue, the guidelines for the BottomNavigationView are now updated and here is how the new navigation guidelines look like.
However, the new guidelines stay as they used to be for the side NavigationView. What I’ve also found in the implementation details of the new Navigation component, here is a part of the code I would like to share:
As we can see in this code snippet, especially on the line 11, the Navigation library internally only checks agains the drawer layout which actually is the NavigationView. That is why setting up the Navigation with a side NavigationView is not adding the up navigation action to the toolbar, but it does for the BottomNavigationView.
Transitions out of box
Let’s get back to the navigation editor and take a look at the notifications and the notificationDetails
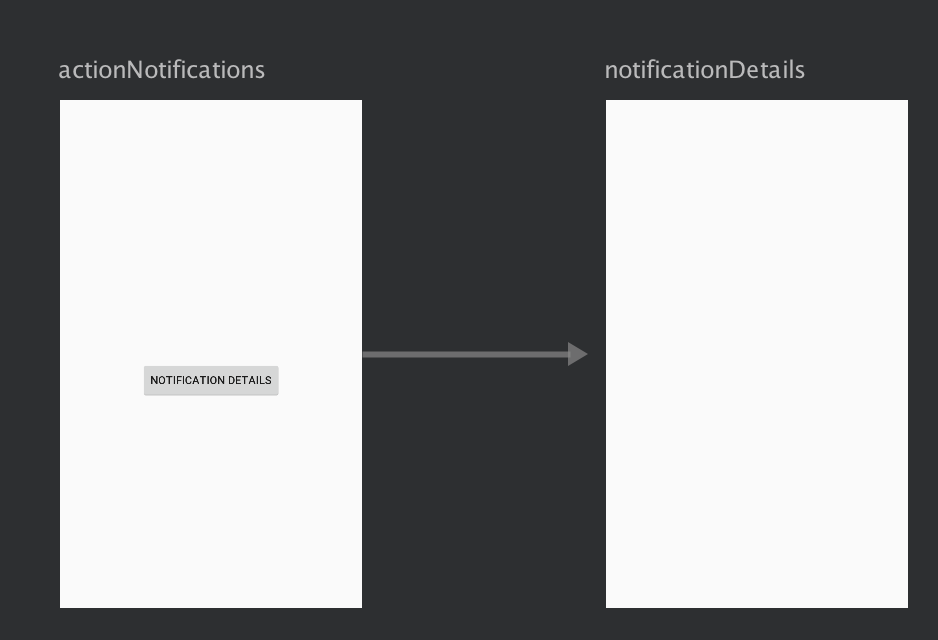
Navigation preview
The arrow that is connecting both fragments is called an action and it essentially defines a way to navigate from the first to the second fragment. By clicking on the action (which will highlight it), we are allowed to edit its attributes in the right-hand side panel
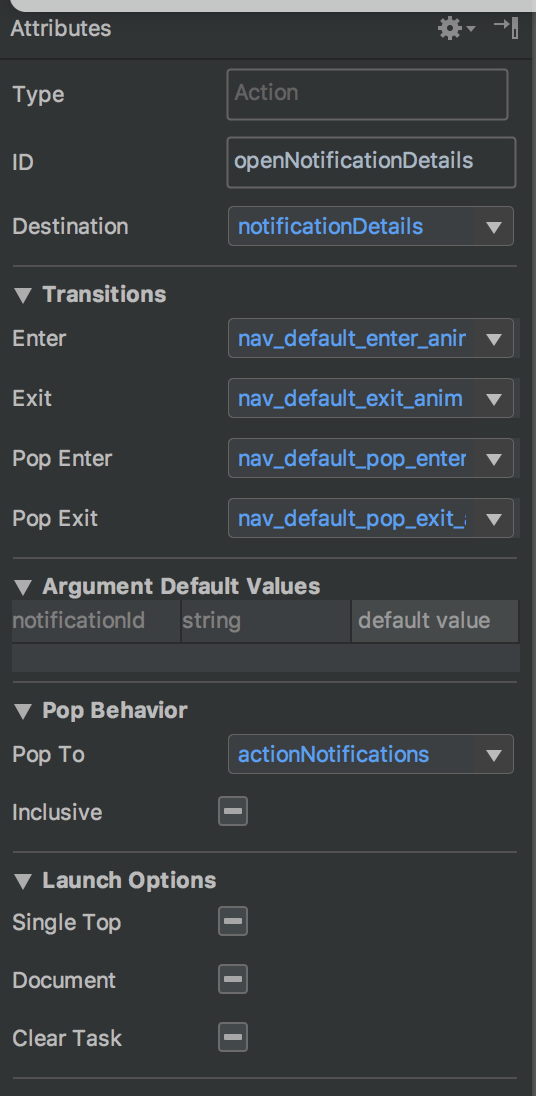
Attributes panel
As we can see here, the action has an id itself, and that is a very important thing (will see later why). Also, there are the enter and exit transition attributes. We could use here some of the predefined transitions, as well as our own transitions defined in the anim folder in the resources. Also, we could set a pop destination, so when the user closes this screen, the navigation will bring him to the desired screen without any mess with the fragment management from our side. The action can define default argument types and their values as well. From the XML preview, it looks like this
It’s up to us whether we use the UI editor or the XML, or combination of both. At this point, all we have done is the definition of the things. We also have to make a call to the navigation to navigate to a destination on a specific event like a button click or so. Here is how we can do it with, and without passing arguments.
As I mentioned before, the action has an id and we can see from the code snippets above that in the navController.navigate call we pass that id. That is how the navigation takes into account all the attributes specified, such as transitions and arguments. Just for the sake of trying, we can replace R.id.openNotificationDetailsAction with R.id.notificationDetails. The navigation will still be able to open the details fragment because in the navigation graph that fragment is defined with R.id.notificationDetails id. However, there will be no transition.
Safe Args
The last thing I’d like to mention is the safe args plugin which is part of this library. In order to make use of it, we have to define a dependency in the main build file:
classpath 'android.arch.navigation:navigation-safe-args-gradle-plugin:1.0.0-alpha01'followed by defining a plugin in the module’s build.gradle file in the plugins section.
apply plugin:'androidx.navigation.safeargs'This plugin is essentially generating code based on the arguments we have defined in the actions in our XML. It generates a class named [Destination Fragment Name]Args. This generated class can be used to simplify the work with the arguments. In our notificationDetails action in the navigation graph, we have defined an argument attribute like this:
Inside the fragment, thanks to the applied plugin, we can read the arguments we passed with pleasure, rather then reading the arguments by id
Also, on the call side, we used to create the bundle ourself with this line
val bundle = Bundle().also { it.putString("notificationId", "Test") }which means we were doing the mapping of the key-values in the bundle ourselves. After applying the safe args plugin, we can update the code to this
Conclusion
The new Navigation component is quite a nice library and a powerful concept, which embraces the single activity approach. I would strongly suggest to everybody to give it a try in a pet project, or just clone my example and play with it a little bit. It’s very important to note that this library is in its alpha version, which means that the API is still not final and may change over time. In case you find any bug or misbehaviors while working with it, do a good thing for the community and report it in the issue tracker.
The Navigation component also improves the deep-linking possibilities and I believe it deserves an article on itself, so I didn’t include that here. Finally, it would be great to find out the different aspects of writing tests for these new things, so stay tuned.